Hey everyone, I hope you are having an incredible day today. Today, I’m gonna show you how to prepare a special dish, homemade miso using a pressure cooker. It is one of my favorites food recipes. For mine, I will make it a little bit tasty. This is gonna smell and look delicious.
Homemade Miso Using a Pressure Cooker is one of the most popular of current trending meals in the world. It’s appreciated by millions every day. It is simple, it’s fast, it tastes yummy. They’re fine and they look wonderful. Homemade Miso Using a Pressure Cooker is something which I have loved my entire life.
Delicious Healthy, Budget friendly Japanese Pork, Miso & Shitake Mushroom Soup cheekyricho Easy Pressure Cooker video recipe. Today we are learning how to make Miso Ramen with Chashu. The Japanese soybean paste called Due to its umami flavor miso ramen has become one of the most famous versions of ramen Whether you use the Chashu sauce or make the sauce separate, making Ramen Eggs is fun and easy.
To begin with this particular recipe, we have to prepare a few ingredients. You can have homemade miso using a pressure cooker using 3 ingredients and 22 steps. Here is how you can achieve it.
The ingredients needed to make Homemade Miso Using a Pressure Cooker:
- Prepare 2 3/5 kg Fresh rice malt (nama koji)
- Get 1 3/5 kg Soy beans
- Make ready 800 grams Salt
Use of a pressure cooker will reduce the cooking time greatly. A flour sack stitched up the sides makes a good sized miso-cover; the ladies at Hokouya have specially dedicated cloths and homemade. A pressure cooker doesn't jostle and actually bubble (the pressure in the pot prevents a rapid boil), which is integral to the emulsification of the fat and water in. ● Pressure cooker. ● Metal rack. Like a slow cooker, a pressure cooker cooks ingredients (such as beans or tougher cuts of meat) in a pot, but does so in a fraction of the time, says Tori So first consider where your pressure cooker is going to live.
Steps to make Homemade Miso Using a Pressure Cooker:
- Rinse the soy beans, and soak them in plenty of water overnight. They will swell up to twice their size by the next day.
- Put the soy beans into twice their volume of water in a pressure cooker and bring to a boil. Skim off the white scum that rises to the surface.
- Put the perforated metal plate that comes with the pressure cooker on top. Lock the lid on and cook under pressure for 10 minutes, then leave to cool down naturally. *If you have a small pressure cooker, cook the soy beans in 2 batches.
- This is the fresh rice koji I ordered by mail and used this time. There are 2 bags containing 1.3 kg each. You can use dried rice koji instead!
- While the soy beans are cooking, mix the koji and salt together.
- Drain the cooking liquid from the cooked soy beans, and hold onto it to use later. *If you're cooking the soy beans in several batches, just keep the cooking liquid from the final batch.
- Let the soy beans cool a bit, and put them in a plastic bag. They'll be hot so wrap the bag in a towel and press down with your hands to mash them. The beans are very soft so this should be easy.
- Add the combined koji and salt from Step 5 to the mashed soy beans and mix well. Mix in some of the cooking liquid until the paste is about the consistency of hamburger mixture or about as soft as your earlobe.
- Line a large container or tub with a double layer of plastic bags. Roll the paste into apple sized balls (these are called miso balls) and throw them hard into the container. Press them in firmly to eliminate any air pockets.
- When all the miso balls have been put into the container, press down hard on the whole mass again while putting your weight into it to remove any air. Sprinkle a handful of salt on top evenly. (This is to prevent the surface from developing mold.)
- Squeeze the inner plastic bag closed while pushing out any air inside. Press a small lid or plate on top, add a weight on top of that and wrap and close the outer plastic bag over all. Cover with a lid.
- Wrap the whole container with another plastic bag. Leave it in a dark, cool place out of the sun.
- Here's the schedule from this point on:
- Mixing up from the bottom (1st time): Check on the miso after about 2 months to see if it has developed any mold! If it has, just remove the parts with the mold. Mix the whole thing up from the bottom after removing the moldy parts.
- Mixing up from the bottom (2nd time): Open up the miso 4 months after the first time you mixed it up! Mix it up from the bottom again.
- If the miso has matured enough when you mix it up the 2nd time you can start eating it, but it will become more delicious if you let it mature for a while longer.
- I made miso this time on February 3rd, the day of spring (Setsubun no Hi). I'm looking forward to how it will turn out.
- April 30th: The first mixing up! It's about 3 months after I made the miso. I opened the lid slowly since I was afraid it had developed mold.
- Looks so good! It's fluffy, and actually starting to smell like miso! It hadn't molded at all as I'd feared, and it's turned into miso. It's not yet edible at this point, though.
- I mixed it up from the bottom. To do this I took the plastic bag out and squeezed the miso over the bag. This way my hands are not in direct contact with the miso, so no bacteria gets into it.
- I returned the plastic bag to the container, and levelled out the surface with a wooden spatula. I closed up the plastic bags again as described above. I left it in a cool, dark place. I'll check on it again in September…maybe it will be ready to eat by then…
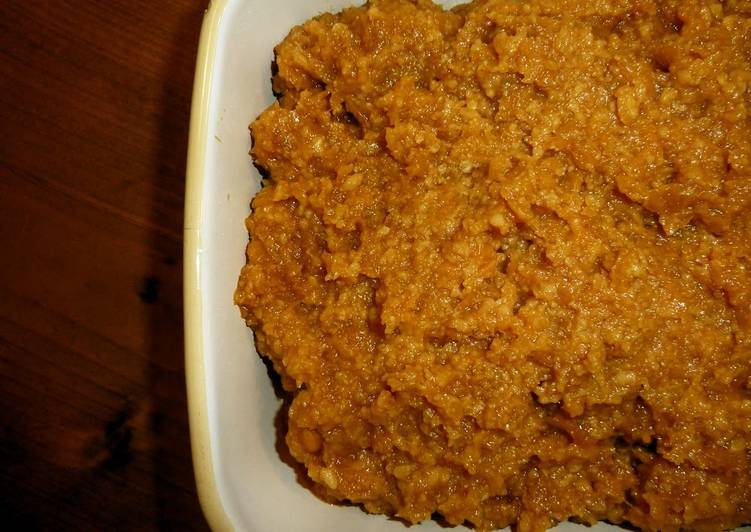
- End of August: It's matured into a delicious looking miso. It's ready to eat at this point. The top photo is of the miso at this stage.
Then choose the size you'll need. Typically a family of four will use a four- to six-quart. Regardless, electric pressure cookers have been on the rise, and I'm totally on board. From beans and grains to meats and dessert, this appliance While your pressure cooker needs liquid to function properly, beware of adding too much. Because food is cooked in a closed environment in the electric.
So that is going to wrap it up for this exceptional food homemade miso using a pressure cooker recipe. Thanks so much for reading. I am sure you will make this at home. There’s gonna be more interesting food at home recipes coming up. Don’t forget to bookmark this page in your browser, and share it to your family, colleague and friends. Thanks again for reading. Go on get cooking!