Hey everyone, it’s Brad, welcome to our recipe page. Today, I’m gonna show you how to make a special dish, yuzu daifuku. It is one of my favorites. For mine, I’m gonna make it a little bit unique. This will be really delicious.
The mochi skin here is spiked with yuzu juice and bits of chewy If you are a purist, there's also a classic daifuku available with plain mochi skin, red bean paste and. As a leading provider of material handlings systems, Daifuku develops, manufacturers and provides a full range of automation and logistics solutions and services to match any needs. Daifuku (大福: literally "great luck") is a traditional Japanese confectionery (和菓子 wagashi).
Yuzu Daifuku is one of the most well liked of current trending meals in the world. It’s appreciated by millions every day. It’s easy, it is fast, it tastes delicious. They’re fine and they look fantastic. Yuzu Daifuku is something which I’ve loved my whole life.
To get started with this recipe, we have to first prepare a few ingredients. You can cook yuzu daifuku using 9 ingredients and 9 steps. Here is how you can achieve that.
The ingredients needed to make Yuzu Daifuku:
- Take Gyuuhi (sweet rice cake)
- Take 50 grams Shiratamako
- Prepare 30 grams Yuzu jam (or yuzu tea)
- Prepare 15 grams Sugar
- Make ready 60 ml Water
- Make ready Filling
- Make ready 120 grams Tsubu-an (or your preferred an)
- Prepare 50 grams Cream cheese (optional)
- Take 1 Flour or katakuriko
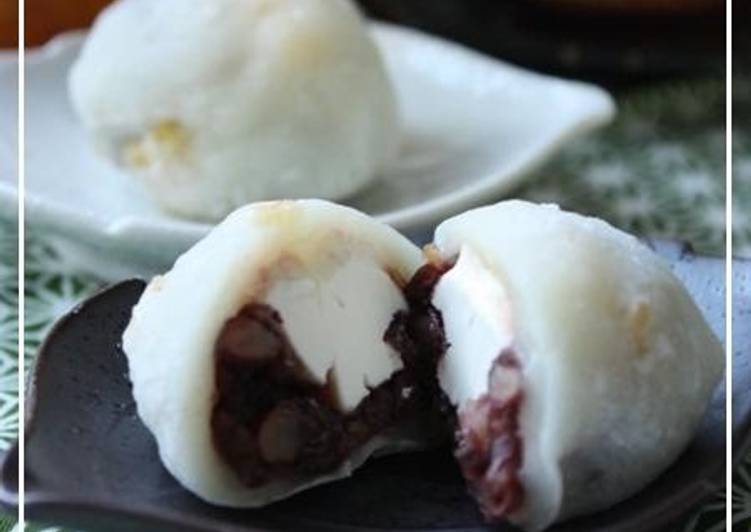
It is usually shaped into small round balls, which consist of a chewy outer layer and a creamy, sweet filling. Daifuku is a popular Japanese snack and usually served with green tea. I've previously shared Strawberry Daifuku recipe on Just One Cookbook, which includes a whole strawberry inside a mochi. "A Daifuku stuffed with strained bean paste and crushed bean paste. A delicious traditional treat that's hard to stop eating.".
Instructions to make Yuzu Daifuku:
- This time I used Okatsugi's yuzu tea recipe. Please refer to. You can use homemade or store-bought items for this recipe.
- Prepare the filling. Ths time I'm using tsubu-an and cream cheese. I split the anko and cream cheese into 6 and wrapped the anko around each piece of cream cheese.
- If you aren't using cream cheese, just roll the anko into balls.
- If the peel in your yuzu tea is a bit big simply snip it up with some kitchen scissors and it'll blend in with the gyuhi.
- Make the gyuuhi. Add the gyuhi ingredients to a heat-resistant bowl. Mix together well to dissolve. Lightly cover the bowl with cling film and heat the mixture in a microwave for 1 minute 30 seconds. (Refer to the hints section here.)
- Take the mixture out and mix well with a rubber spatula. Once sticky and glossy move onto the next step. If it's still a little watery, microwave for a further 30 seconds.
- Place the gyuhi dough onto a vat or similar dusted with katakuriko. Divide into six portion. Once the gyuhi has cooled just enough so that you can work with it, move onto the next step.
- Stretch the gyuhi dough out until larger than the balls of anko. Keep the centre still quite thick and stretch whilst dusting with katakuriko, then wrap the dough around the anko. Pinch the seam securely shut.
- They're done! They will stay soft for 2 days when kept in the fridge. Wrap them up so they don't dry out.
Community content is available under CC-BY-SA unless otherwise noted. Daifuku (pronounced: dye-foo-koo) North America is a subsidiary of Daifuku Co. Product and solutions site of the leading material handling system provider DAIFUKU. Find solutions for your logistics needs. Completely hide entries from your search that are considered hated based on your tag preferences.
So that is going to wrap this up with this exceptional food yuzu daifuku recipe. Thanks so much for your time. I’m confident that you can make this at home. There is gonna be interesting food in home recipes coming up. Remember to save this page in your browser, and share it to your loved ones, friends and colleague. Thank you for reading. Go on get cooking!